When a hardware or operating system failure occurs, and a server can no longer start itself, a bootable recovery media can start the system, load a recovery environment and use a System and Volume bare-metal backup to recover the server. BackupAssist uses RecoverAssist to create a bootable media.
RecoverAssist bootable media is attached to a server and launches a recovery environment when the system starts. The RecoverAssist recovery environment is then used to locate a backup and recover the server.
The RecoverAssist Builder creates a standalone bootable media using the Recovery tab. It can also be used to make a backup bootable if the System Protection backup job was unable to.
- RecoverAssist can automatically adjust the appropriate Windows settings when recovering to dissimilar hardware.
- RecoverAssist avoids many of the Windows Recovery Environment’s Blue Screen of Death issues.
- A standalone bootable media can be customized to include files, tools and additional drivers.
The RecoverAssist Recovery Environment loads from a standalone bootable media or a Bootable Backup Media. It provides a user interface from which you can access your backup and start a recovery.
- The recovery environment provides access to recovery tools, applications and custom drivers for standalone bootable media, or a Bootable Backup Media that was manually made bootable using RecoverAssist (System tab).
- The recovery environment access to a command prompt.
- The recovery environment can access backups on local or remote destinations.
The type of operating system that you are creating the RecoverAssist media for, will determine how the media can be created. There are two ways to create a bootable media using RecoverAssist: From the operating system’s installation disk or using the operating system installed on a computer.
Note: Bootable media can't be created using a Windows Server Core installation. You can use a RecoverAssist media created on a Windows Server installation, to launch a recovery environment and access backups of a Core Server for a recovery.
Note: A recovery media’s operating system, must match the operating system of the System Protection backup.
Note: Operating systems that can create a recovery environment from the computer’s installed operating system, can find the option is grayed out due to the way the operating system has been installed. If the option is grayed out, the operating system’s install disk should be used to create a RecoverAssist media.
A computer’s BIOS or EFI (a chip containing basic hardware settings) detects the hardware needed to start the computer. When you turn your computer on, the BIOS / EFI will display some of the steps onscreen and beep to confirm that it has run successfully. It is important to know if your backup and recovery computers use BIOS or EFI because the firmware compatibility will determine your recovery options.
- Backups made on a computer with one type of firmware cannot be used to start a computer that uses a different type of firmware.
- EFI booting can be turned off. When EFI is turned off, the system will use BIOS to boot.
This table shows the firmware compatibility of BIOS and EFI computers.
| Backups of a BIOS machine | Backups of an EFI machine | |
| Recover to a BIOS machine | Compatible | Incompatible |
| Recover to an EFI machine | Incompatible | Compatible |
Warning: Advanced format (4k sector) drives using BIOS may not work in certain environments. We recommend performing a test recovery to ensure you environment is supported. Performing test recoveries are an important part of disaster recovery planning.
Supported bootable media
For a standalone bootable recovery media: External USB hard drives; USB thumb drives and SD cards; CDs, DVDs and BDs
For a Bootable Backup Media: External USB hard drives
Memory
The computer being recovered must have at least 4GB of RAM.
Disks
When planning a recovery, it is important to know the details of the disks that were backed up (to create the backup), and the disks on the computer that you plan to recover (using that backup).
The 2 critical disk requirements for a recovery are:
- The computer that is being recovered, must have a physical disk the same size, or larger than, the physical disk that the backup was made from. For example, if your backup contains 200GB from a 1TB drive, the physical disk of the computer that you are recovering, must be 1TB or larger.
- If the backup used in a recovery contains data from multiple disks, the computer that is being recovered must contain at least the same number of disks. For example, if the backup image contains data from 2 physical disks, then the computer being recovered must have at least 2 physical disks.
Note: The computer being recovered must have a physical disk setup that's compatible with the computer that was backed up.
Creating a bootable recovery media
This section explains how to create a stand-alone bootable media. A standalone bootable media boots into the RecoverAssist environment and uses a System Protection bare-metal backup on separate media, to recover the server.
Launch BackupAssist and follow these steps:
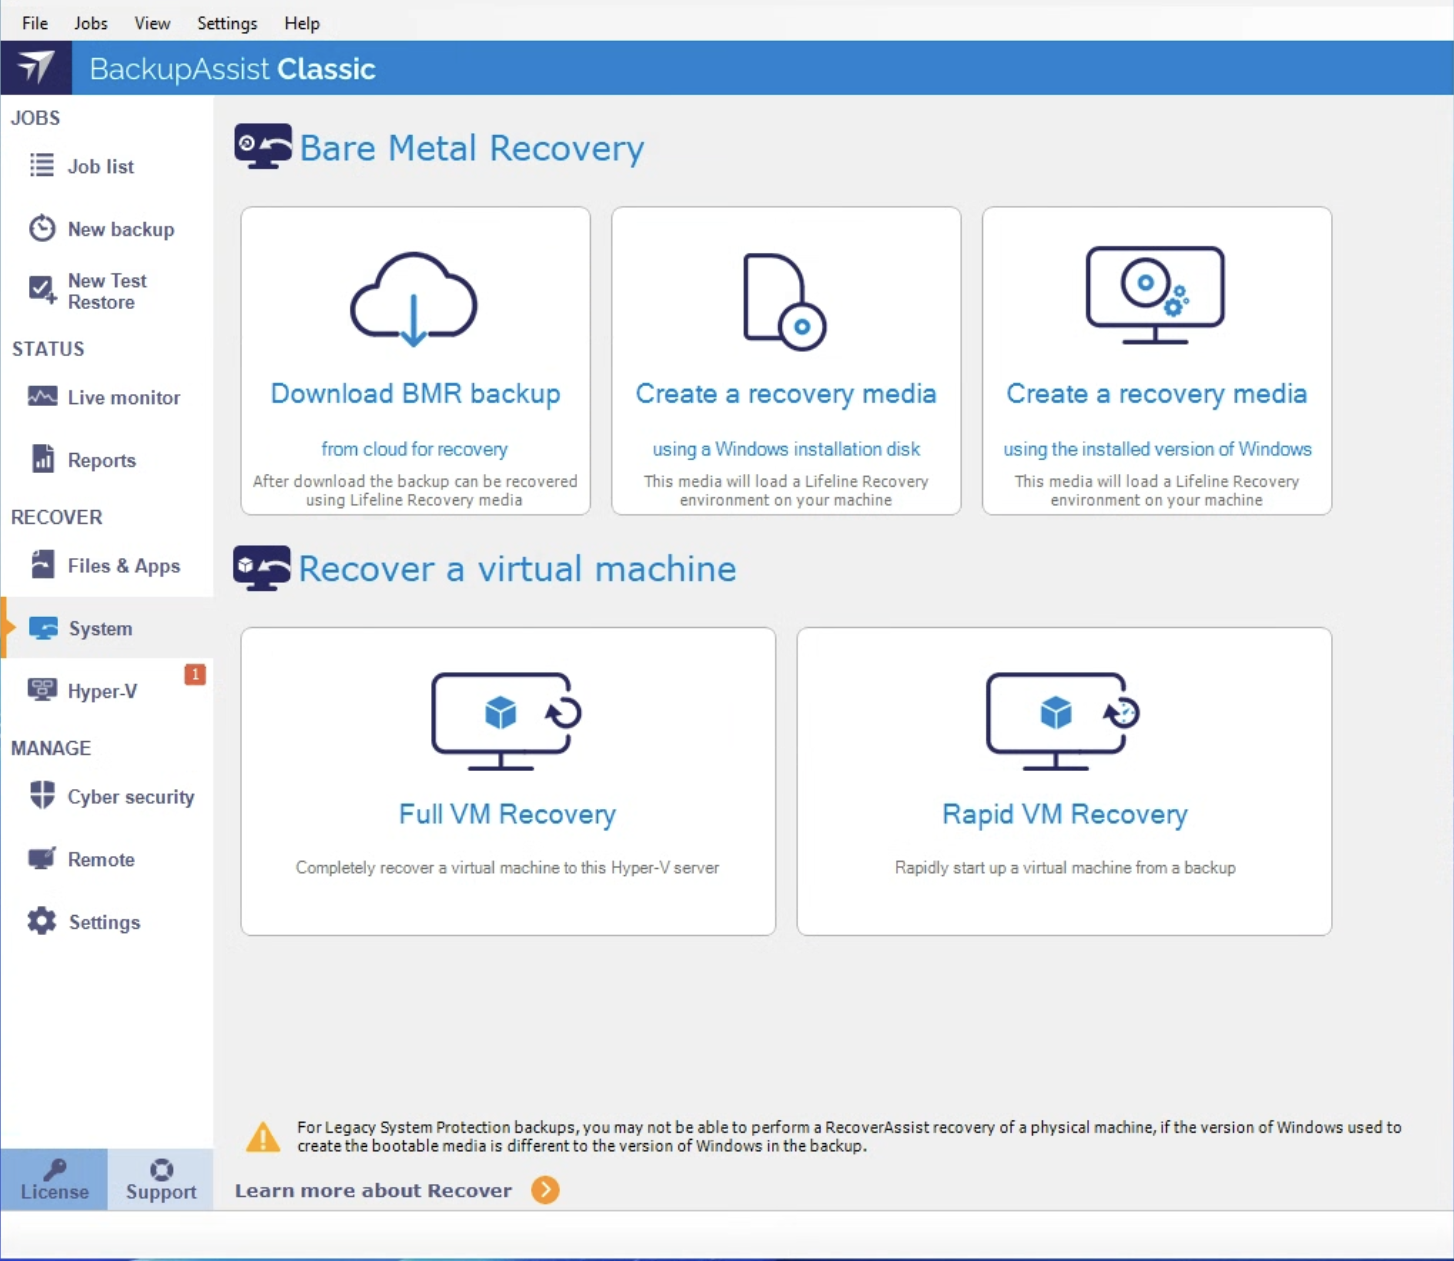
- Select the System tab in the RECOVER navigation section.
- Select how you want to make the bootable media
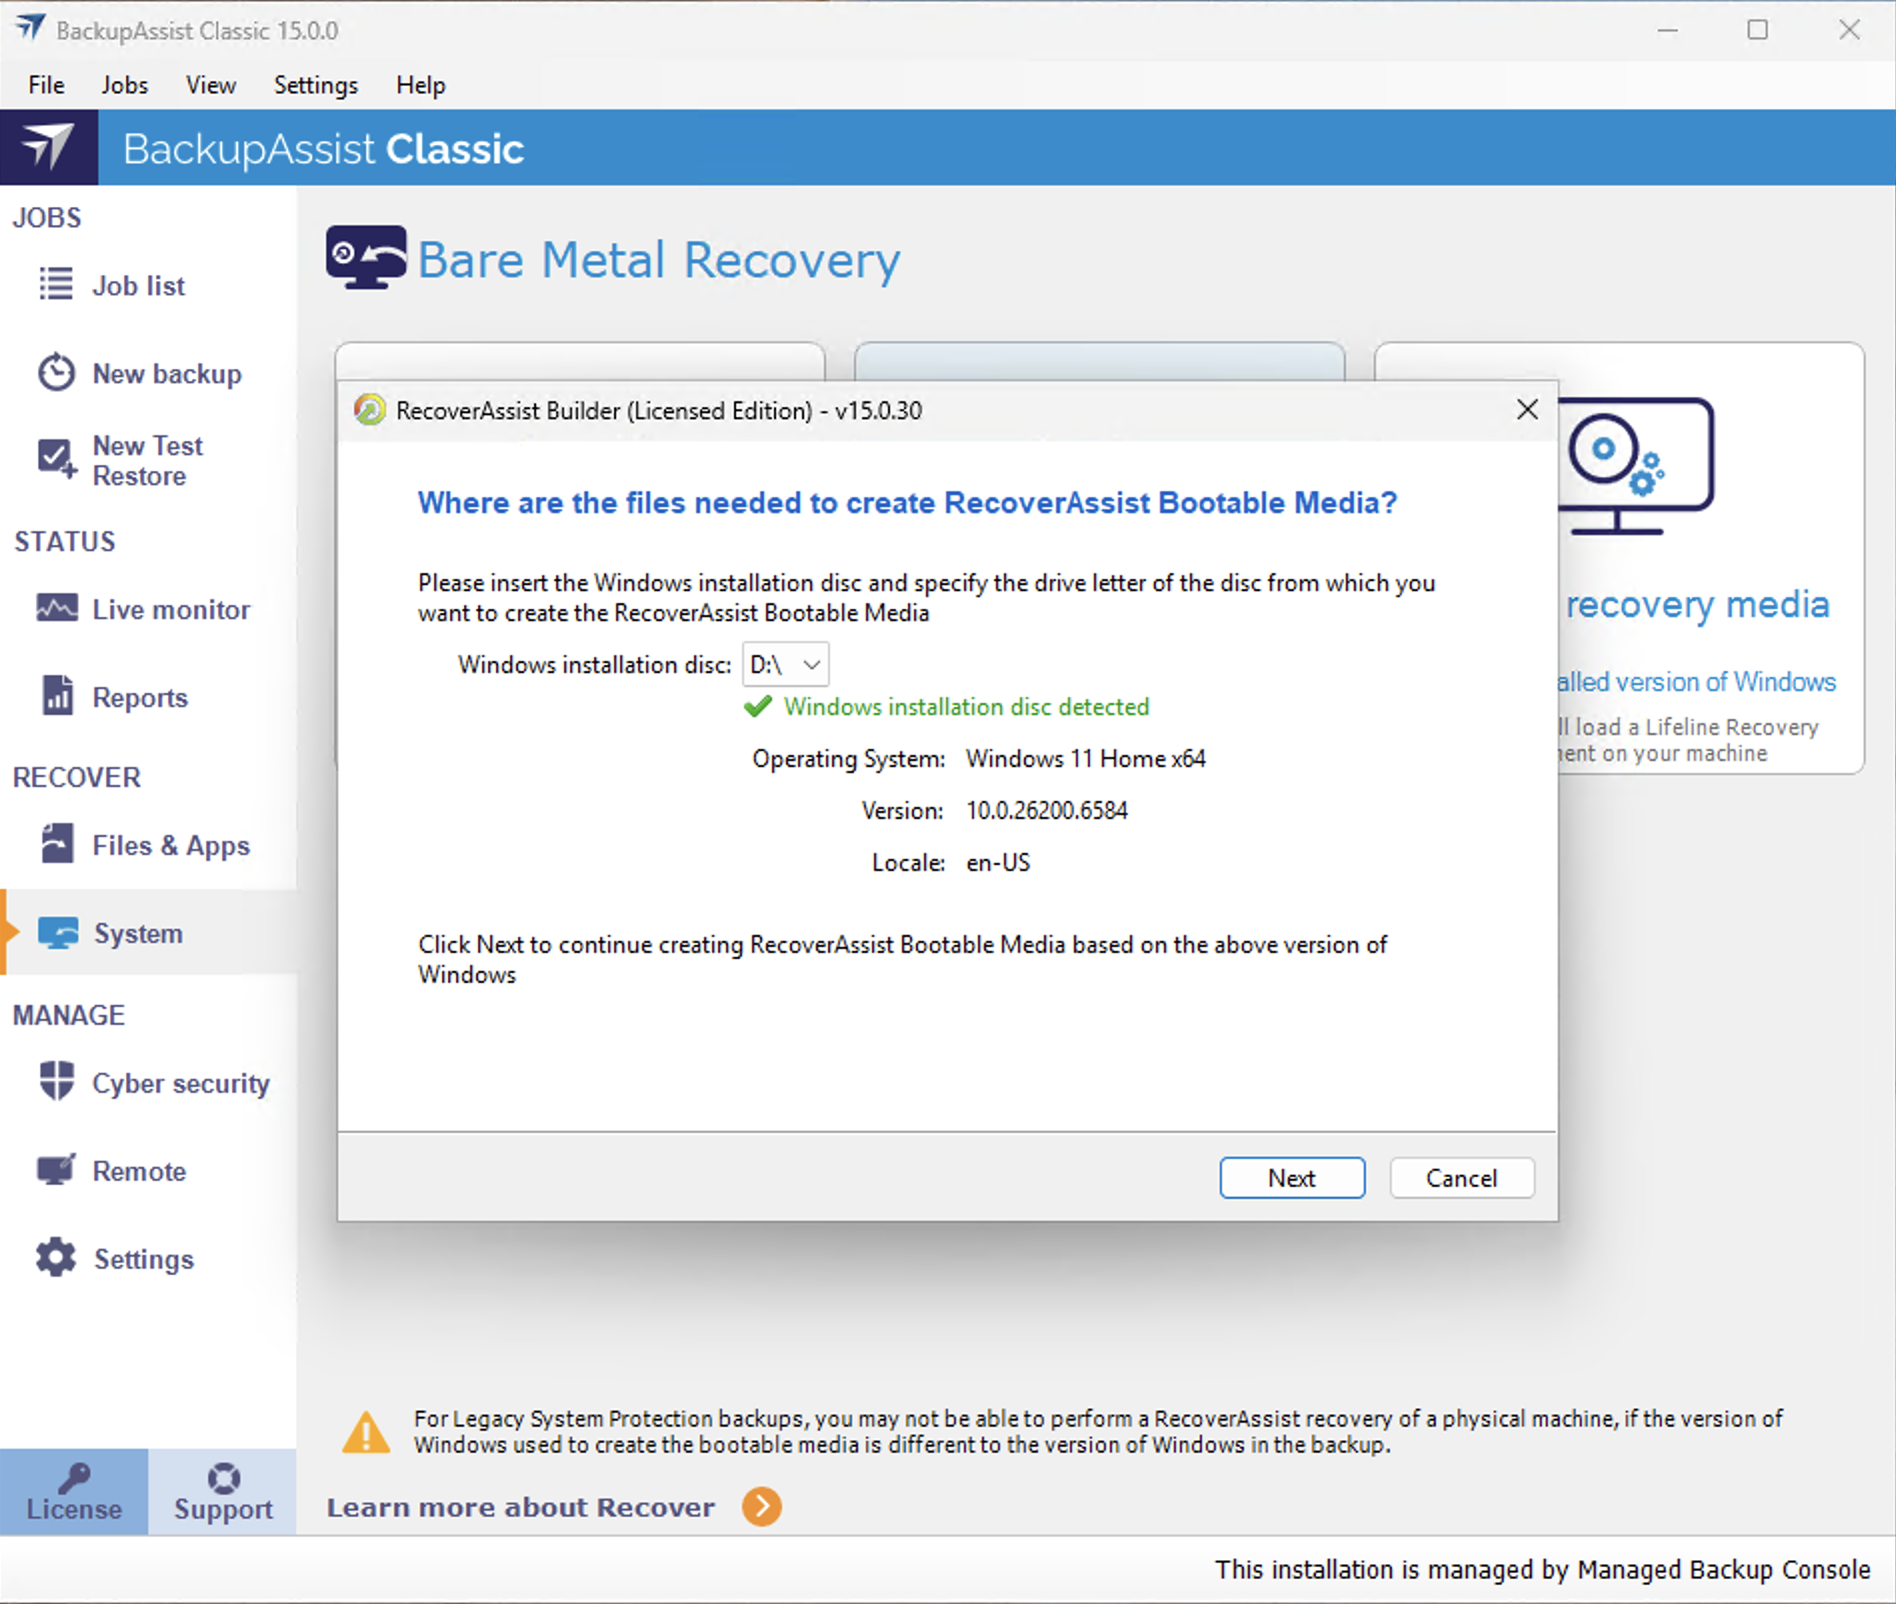
- Select or confirm the Operating System location
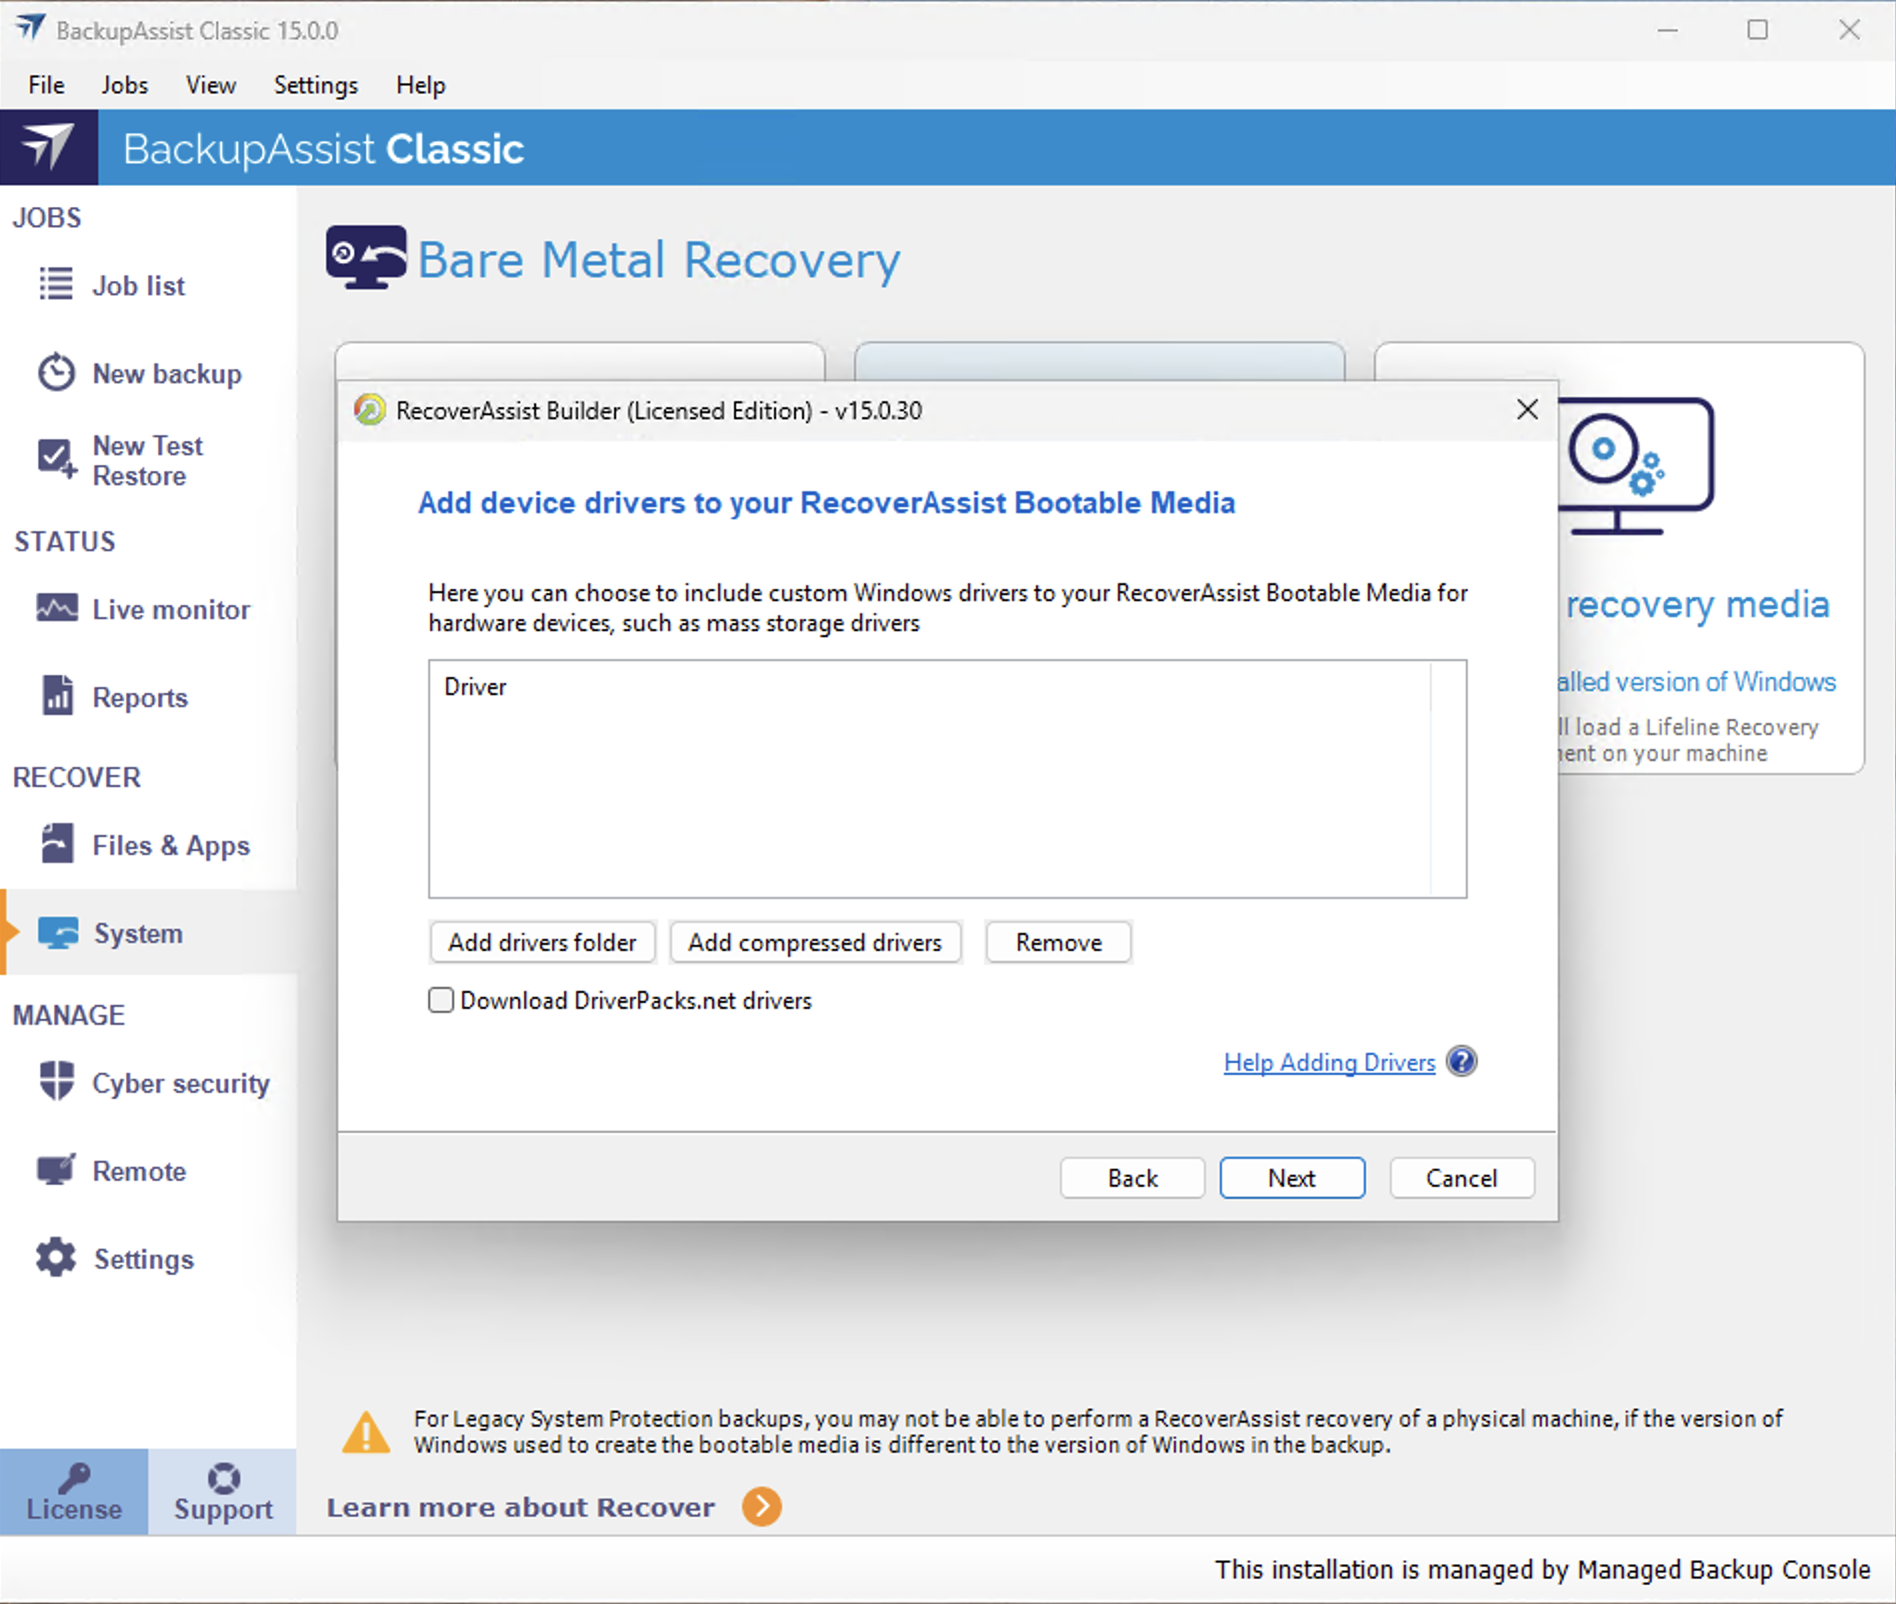
- Add any device drivers that you may require
- Add drivers folder allows you to browse to the location of the drivers that you want to add to the recovery media. Drivers should be added in an unpacked state.
- Add compressed drivers will unpack any compressed drivers you select and add them to the recovery media.
- Download DriverPacks.net will download a recommended driver pack. The drivers will be automatically downloaded and added to the media during the media creation stage.
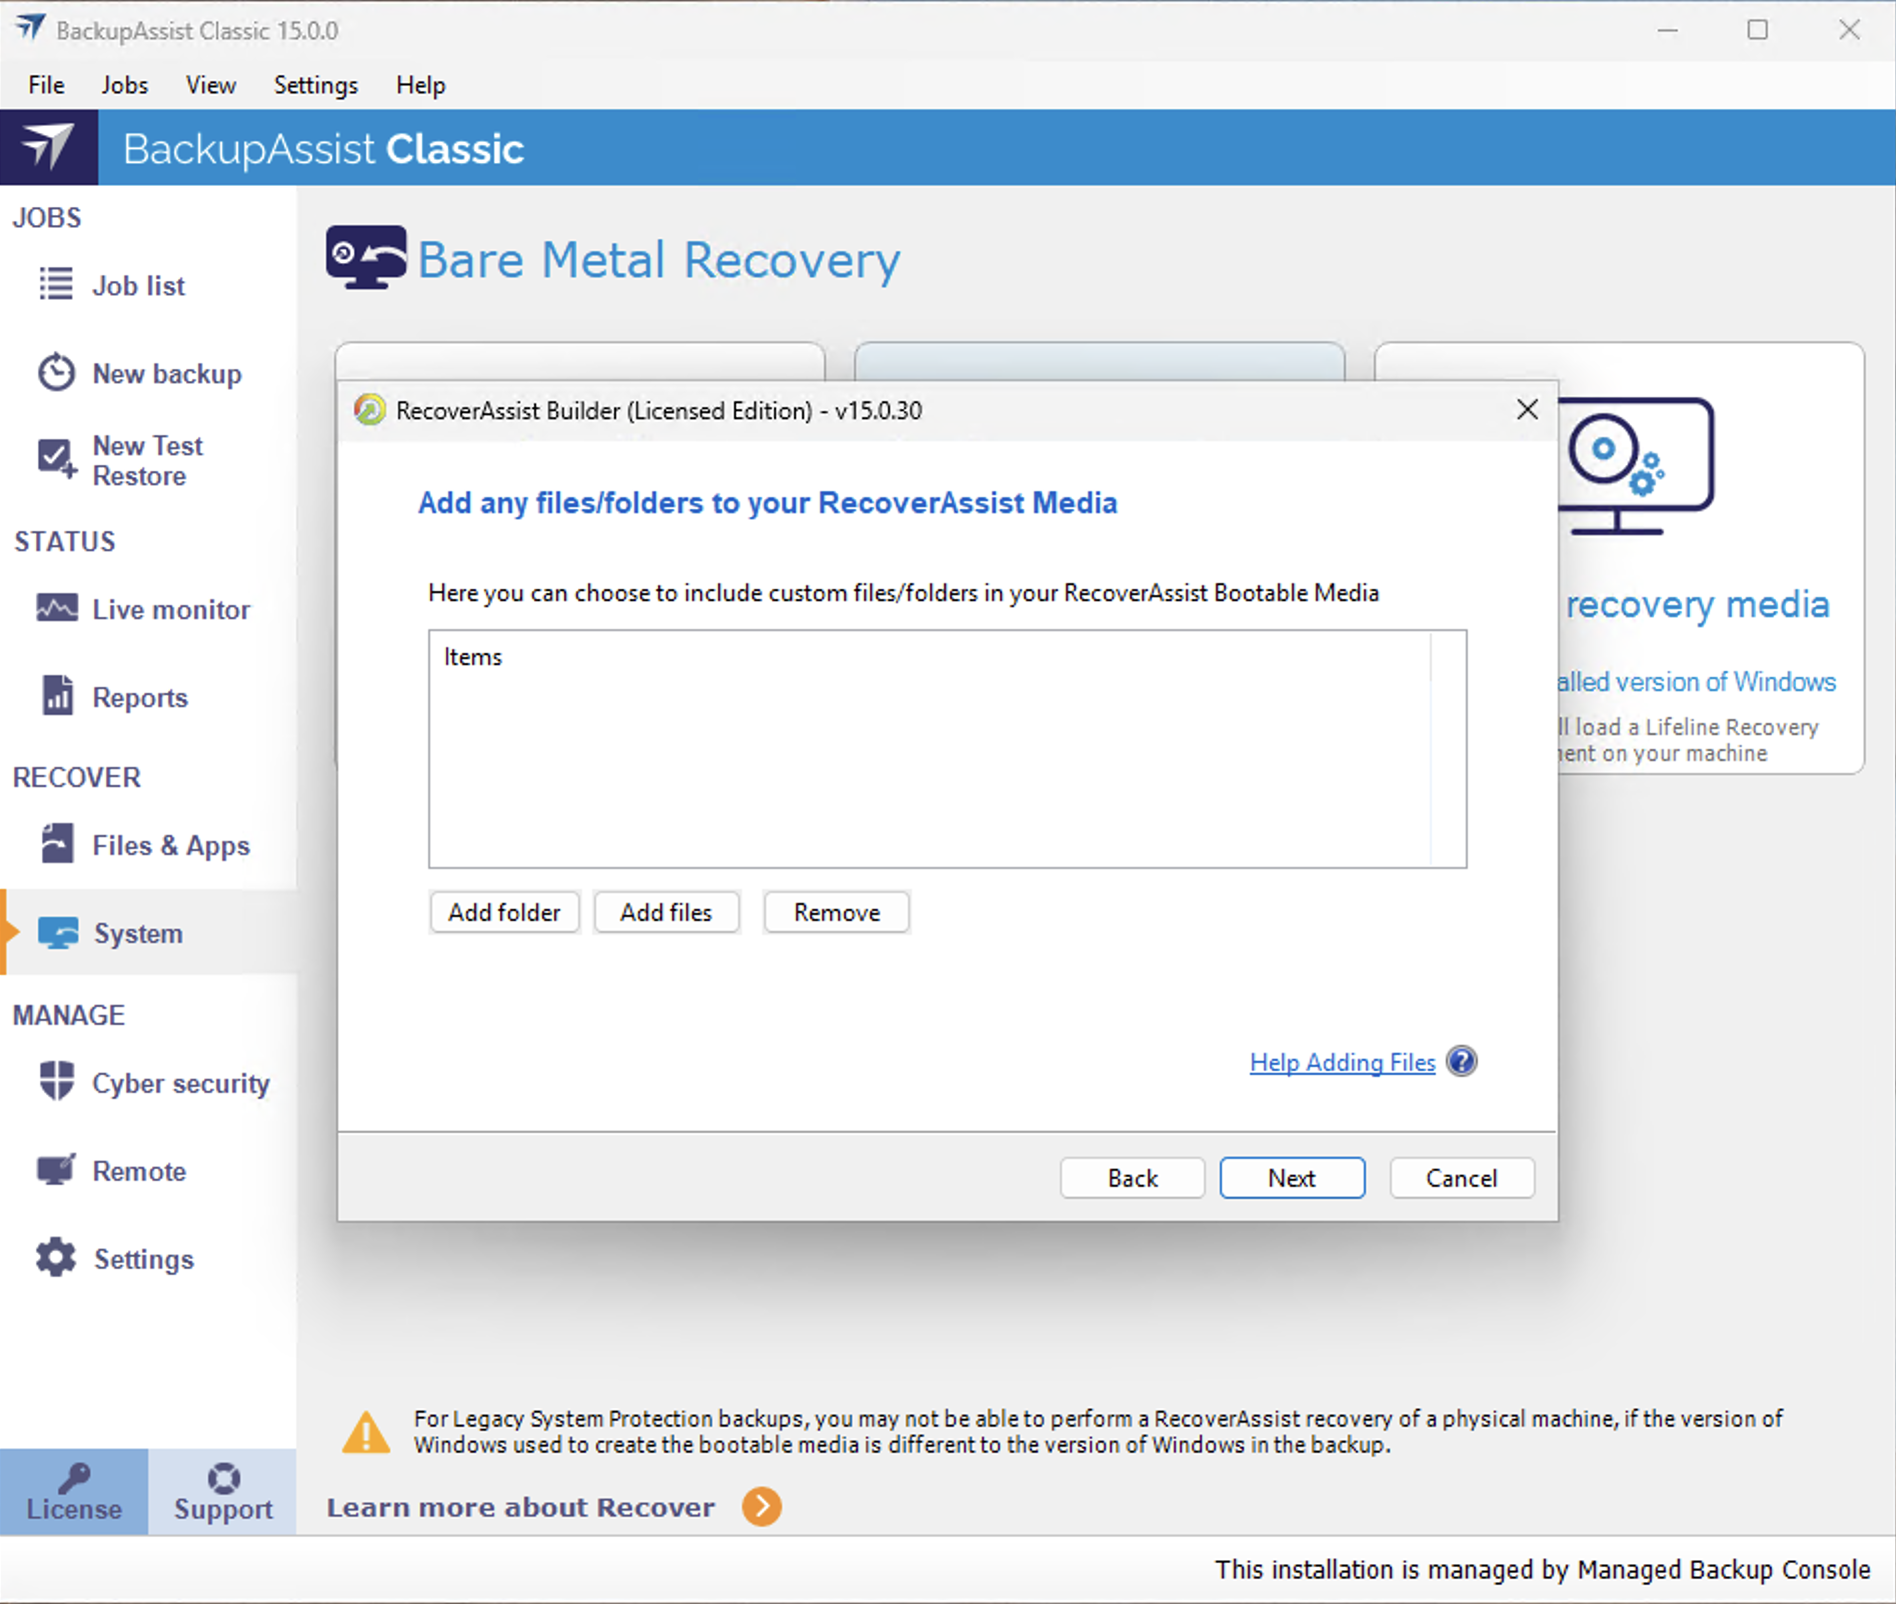
- Add any files / folders that you require
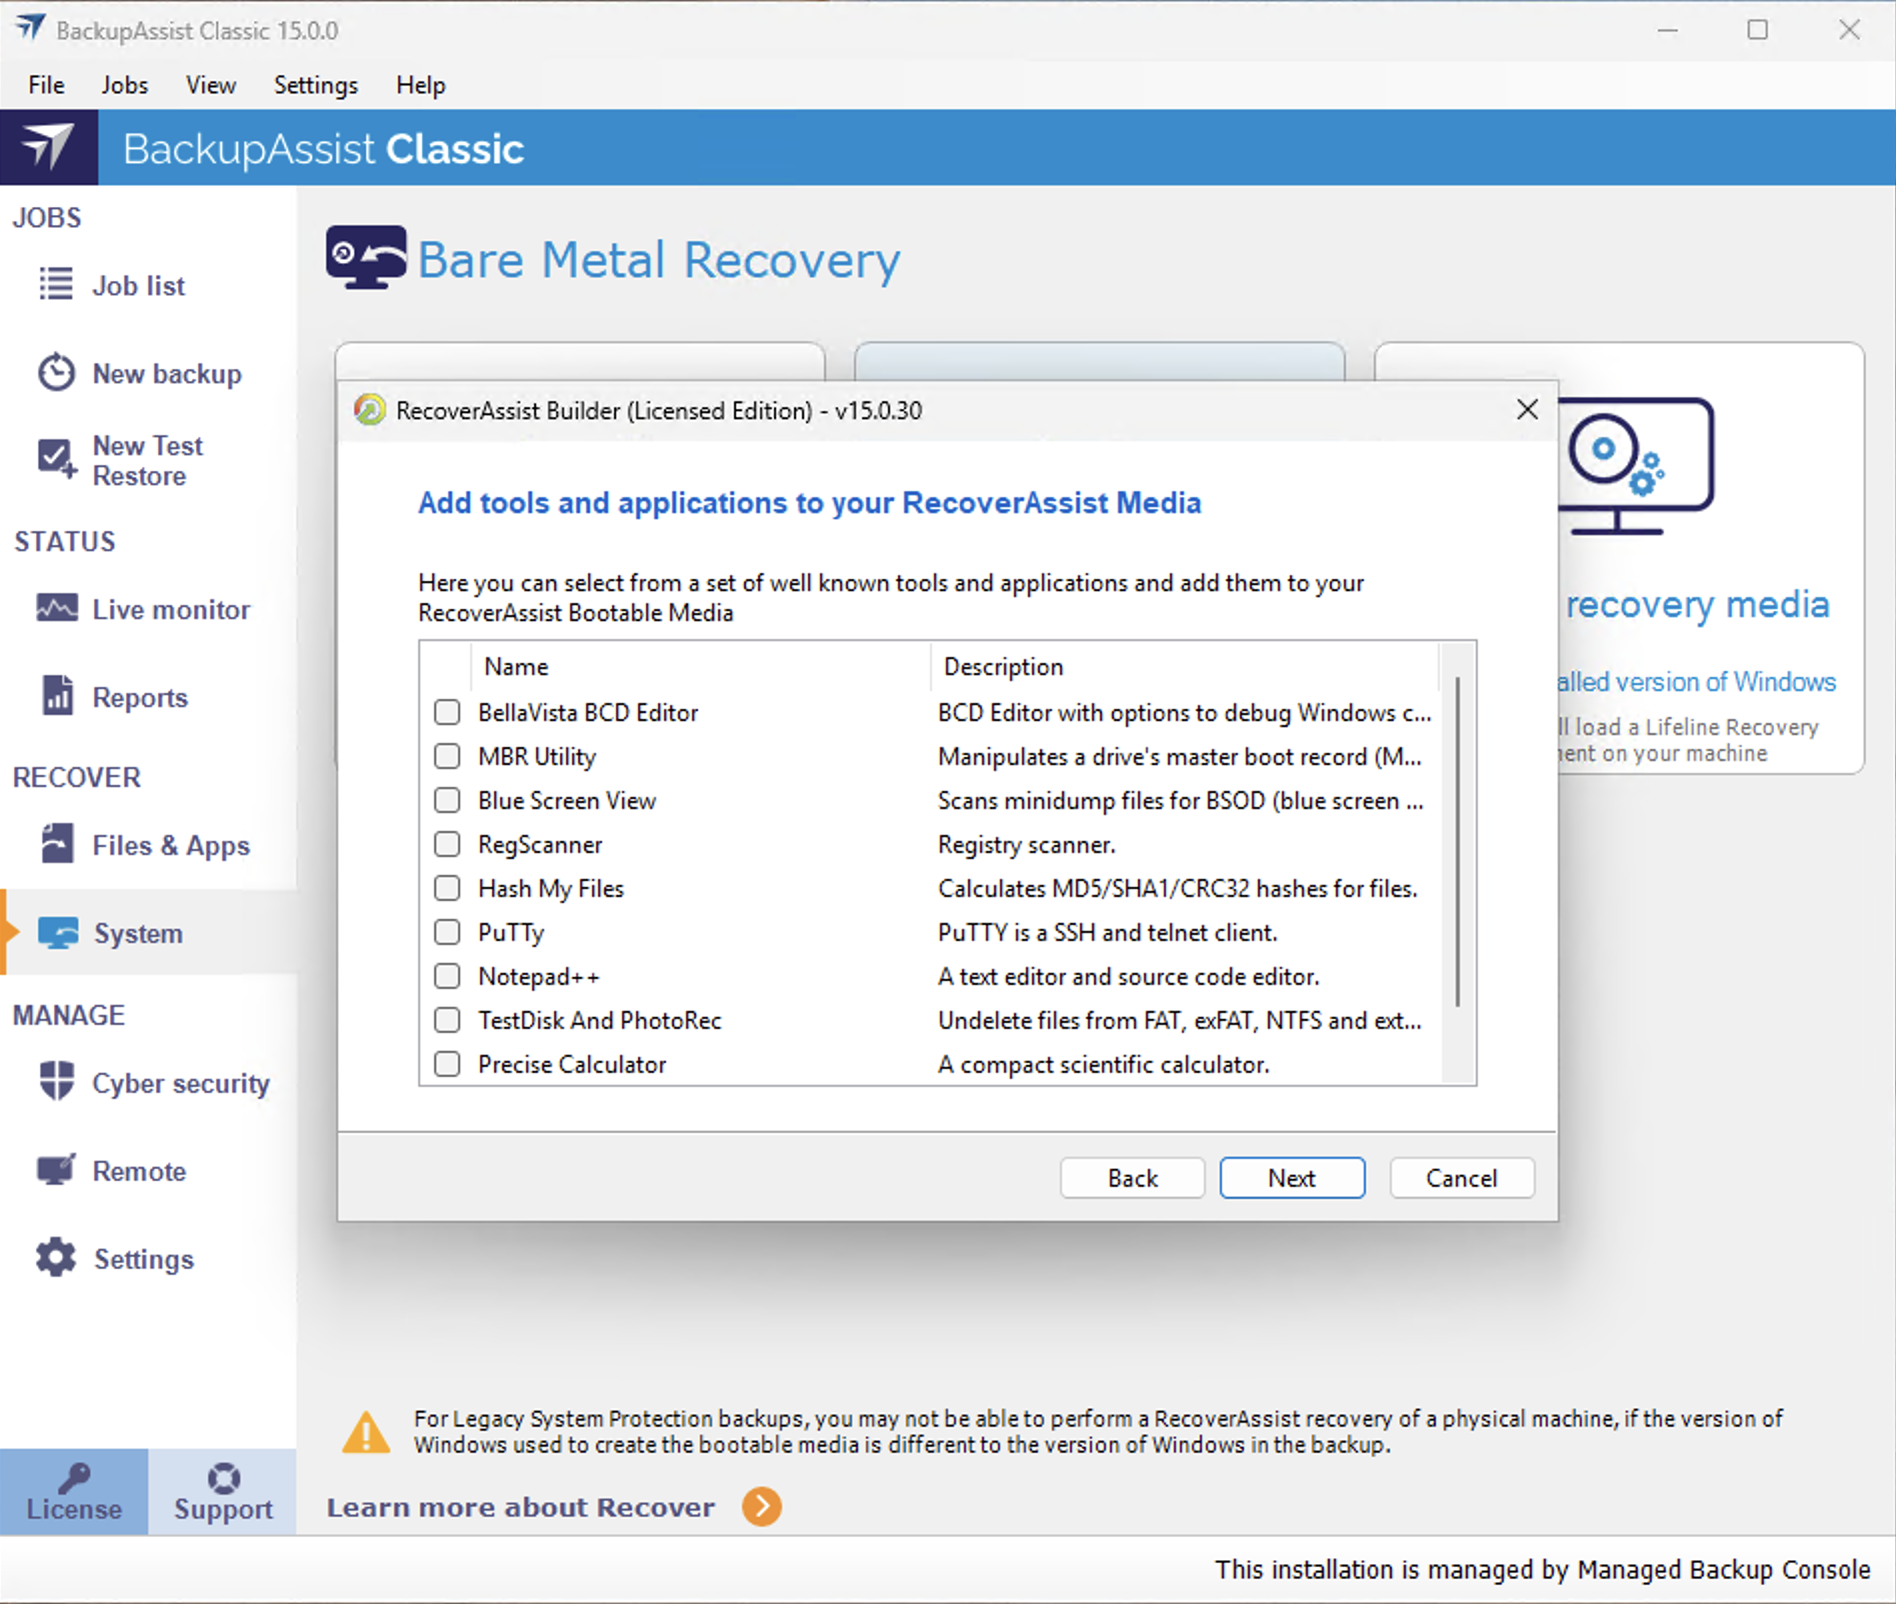
- Add what you want to include from the list of tools and applications available
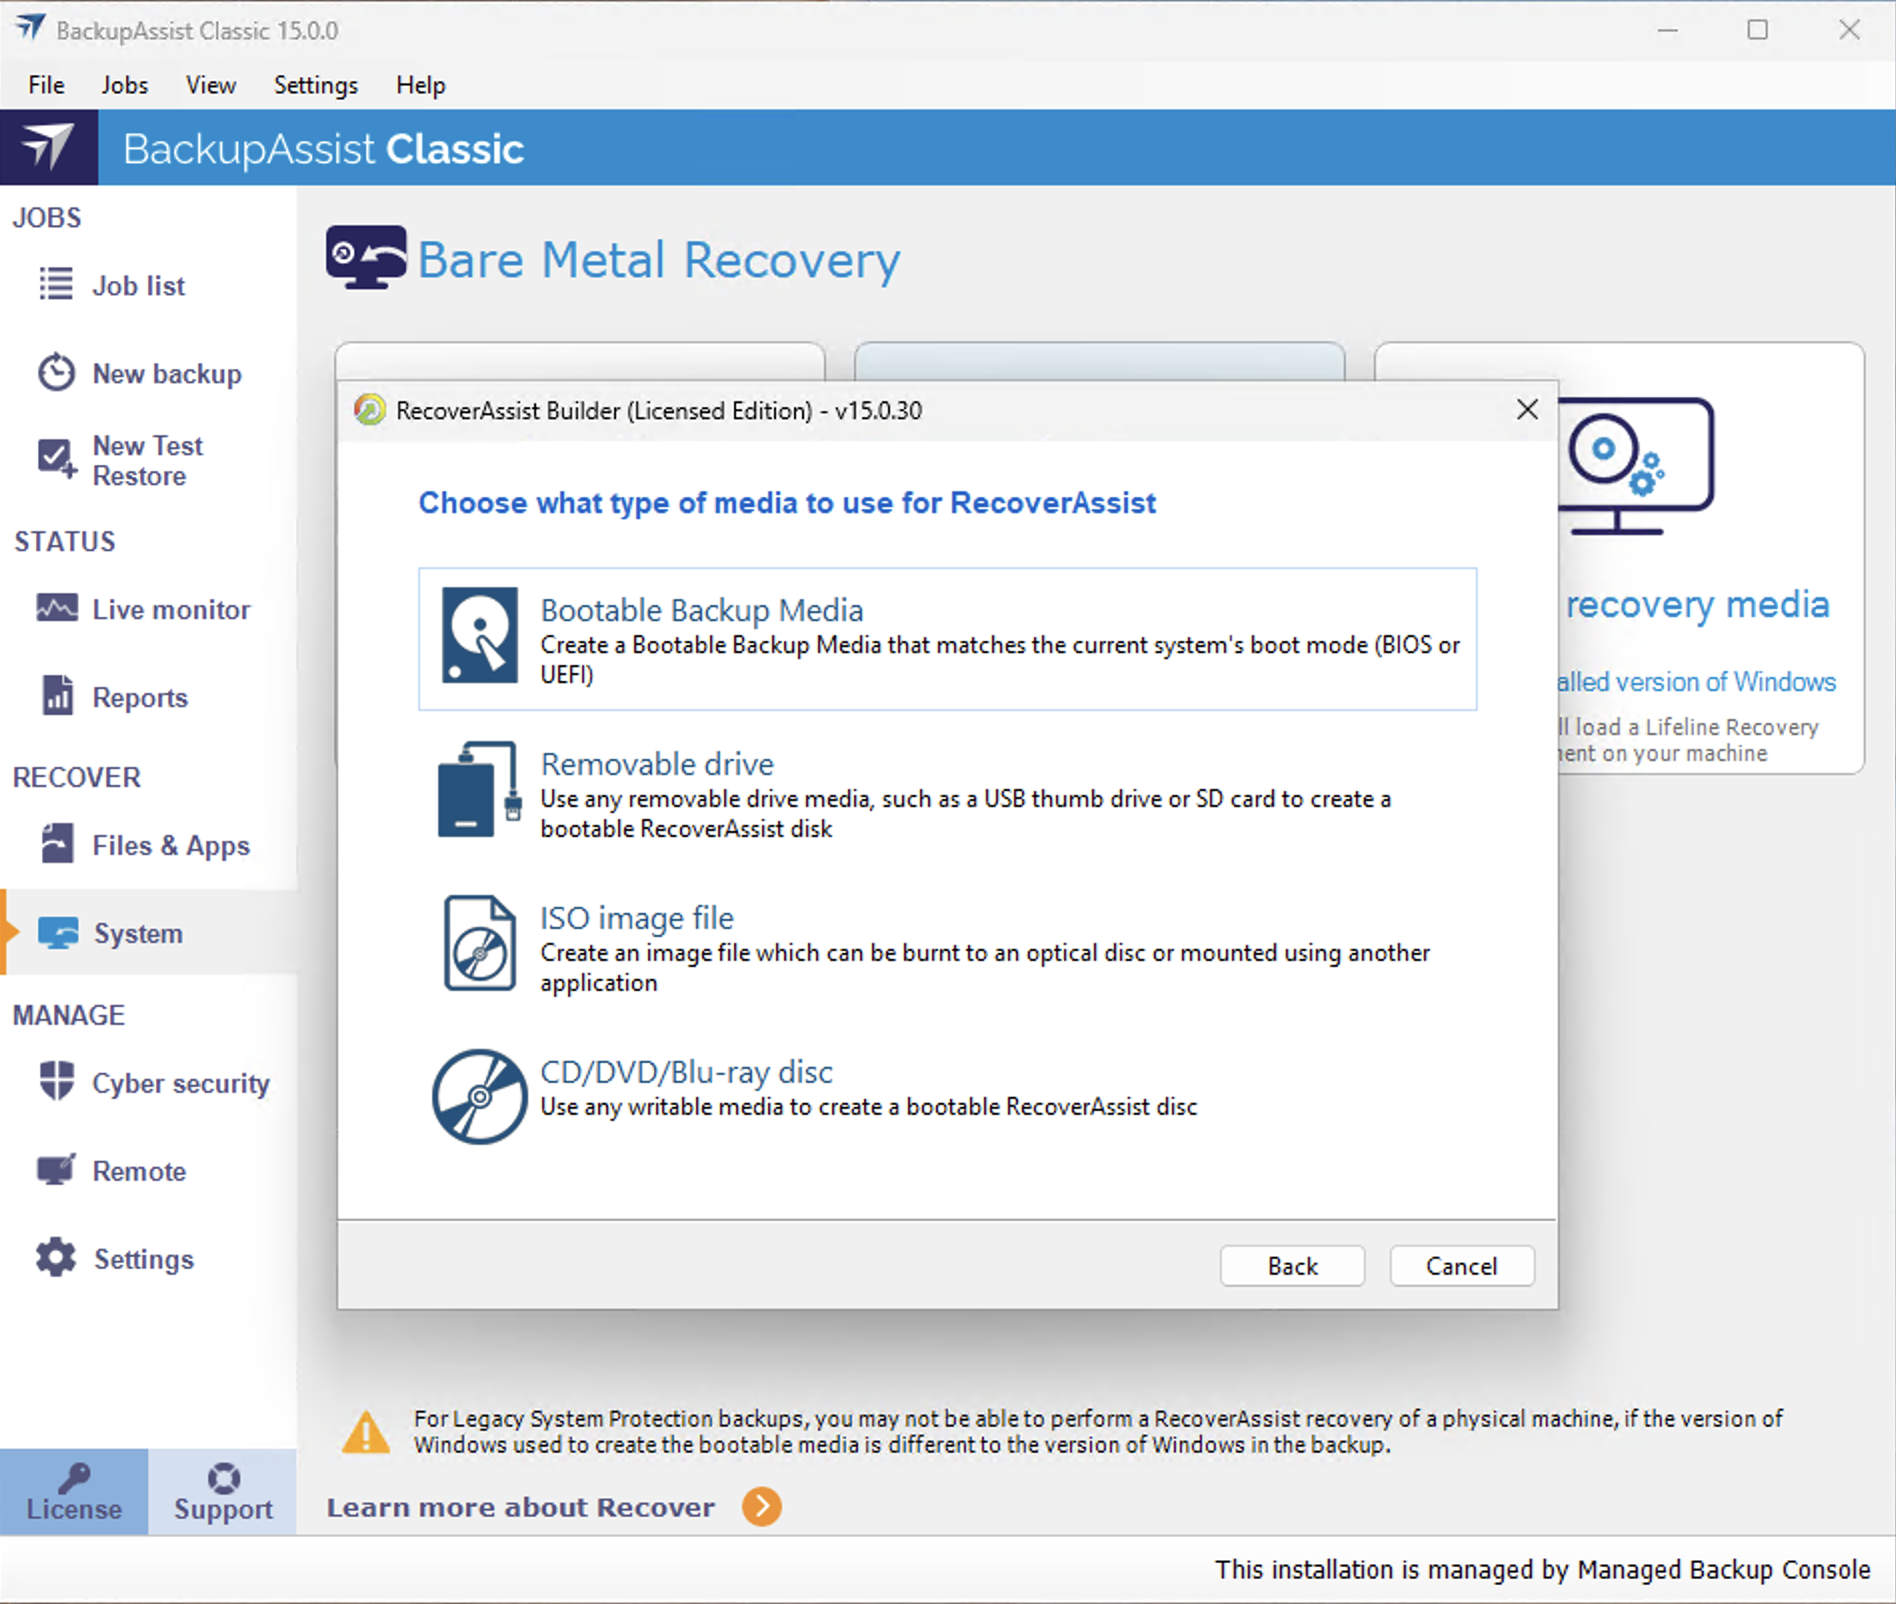
- Select the type of device to be used for the bootable media
- Select the bootable media to be used
Select either Create a recovery media using the installed version of Windows or Create a recovery media using a Windows installation disk.
If you select, Create a bootable media using the installed version of Windows, RecoverAssist will use the computer you are on, and its operating system, to create a bootable Recovery disk. If the operating system requires an install disk, this option will be greyed out and not selectable.
If you select, Create a bootable media using a Windows installation disk, RecoverAssist will use a Windows operating system installation disk, to create a bootable Recovery Environment.
Warning: OEM installations of Windows and Windows installation media provided by system manufacturers may include altered system files that could cause RecoverAssist recovery environments to fail. BackupAssist recommend the use of a Microsoft issued install disk or ISO when building RecoverAssist recovery media.
When you make a selection in step 2, the RecoverAssist dialog will open. Confirm the Operating System or provide the location of the installation disk to be used, and click Next.
If you selected, Create a bootable media using the installed version of Windows, RecoverAssist will confirm the operating system details for the computer you are on.
If you selected, Create a bootable media using a Windows installation disk, RecoverAssist will try to detect the media. If it cannot, it will ask you to insert the Windows installation disk (for the computer that the recovery media is being created for) and select the drive letter from the drop down list.
RecoverAssist let's you add your own drivers to the bootable media. These drivers may be required to give the recovery environment to the backup location and the local hardware. Make your selections, and click Next.
RecoverAssist will automatically select the appropriate driver to be used during the boot process.
There are 3 selections that can be used to add drivers:
You can add your own files and folders to the bootable media and have them available to use when you are performing the recovery. Make your selections, and click Next.
This step displays a list of useful troubleshooting and support tools that you can choose from. Make your selections and click Next.
RecoverAssist can use removable drives, ISO images or optical disks as bootable media. You can also make a backup media bootable using the Bootable Backup Media option. Make your selections, and click Next.
Bootable Backup Media
This option adds RecoverAssist to the backup media. A Bootable Backup Media can be used to boot into a RecoverAssist recovery environment and recover the server, without a separate boot disk. A warning will appear if RecoverAssist needs to format the backup media. If a format is required, all data on the drive, including any backups and backup history, will be lost.
Removable drive
This option will create the recovery image on a removable drive. A warning will advise that the removable drive will be formatted before it is written to. This means everything currently on the drive will be deleted.
An ISO image file
This option will create an ISO image. Although the saved ISO image is not on a bootable media, it can be used to create a recovery image that can be saved to a bootable device at a later date.
CD/DVD/Blu-ray disc
This option will detect the optical drive on your computer and ask you to select the drive containing the optical media.
This step allows you to select or browse to the media or location to be used. The screen and options will depend on the type of device selected. When you select Next, the bootable media creation will begin.
A progress bar will be displayed. Once it has completed, click Finish.
The bootable media has now been created.
After the RecoverAssist media has been successfully created, you will have an option to either create an additional RecoverAssist media with same settings or close the RecoverAssist builder.
Warning: Any bootable RecoverAssist media created during the BackupAssist trial period it will expire. The RecoverAssist media will need to be re-created once a BackupAssist license has been purchased. This must be done after you purchase a license.
Creating a bootable backup
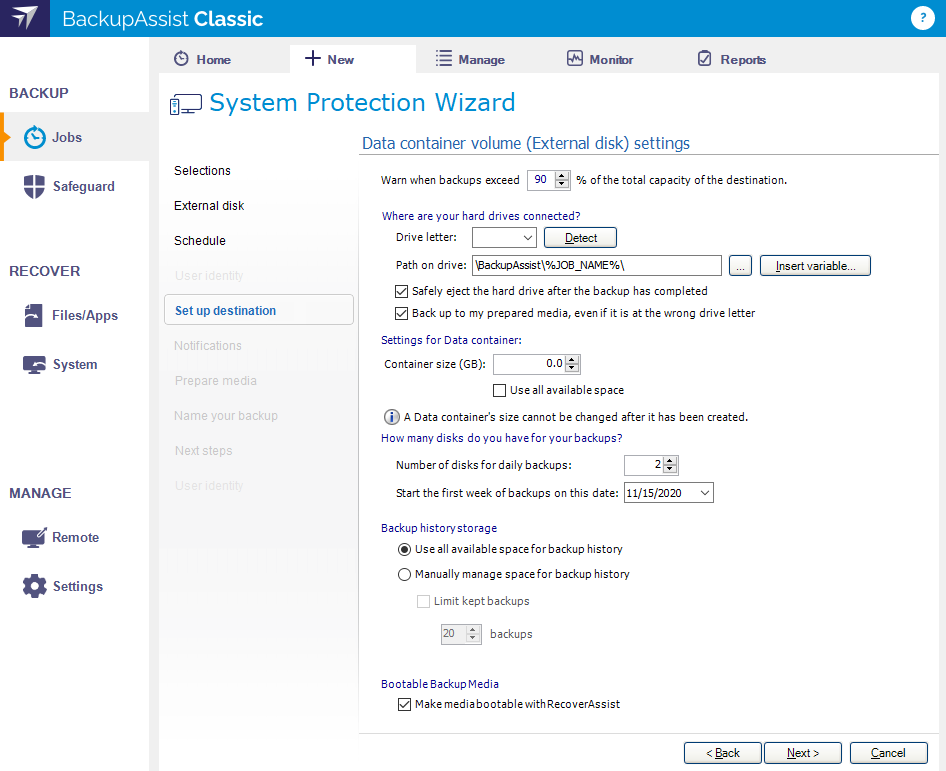
If you create a System Protection bare-metal backup on an external USB hard disk, the media will be made into a Bootable Backup Media, which can boot a server into a recovery environment and recover the server, without a separate boot disk. When you create the backup job, the media will be made bootable by default, unless you deselect the Make media bootable with RecoverAssist tick box on the Set up destination step.
Creating a Bootable Backup Media job
- Selecting Prepare on the Prepare media step will generate a Destination Check Report. This report will advise if the backup media cannot be made bootable.
- As long as the media is an external USB hard disk, it will be made bootable the first time the backup job runs. This can make the first backup take longer than a normal backup.
- After you run the backup job, the backup report’s Recovery section will note if the backup media was made bootable or if the boot information was updated.
- If there are problems making the media bootable, you can use the System tab to manually make the backup media bootable, or make a separate, standalone RecoverAssist media.
Considerations:
- If a newer version of RecoverAssist is released, it will be applied to the media.
- If a bootable media is created using a trial version of BackupAssist, it will be updated if a license key is purchased.
- If the operating system being backed up changes, the bootable media will be updated to support it.
- Bootable backups will speed up your disaster recovery process
Disaster Recovery resources
BackupAssist's blog includes Disaster Recovery related articles that explain best practices and advice on how to make the most of BackupAssist in your disaster recovery process.
- A disaster recovery graphic that explains a recovery in 4 simple steps. Read the article.
- How to plan for a BackupAssist / RecoverAssist recovery. Read the article.
- P2V fir disaster recovery. Read the article.
- How to perform a P2V recovery with BackupAssist. Read more.
